Welcome to the 3rd instalment of my Dust Tactics Ludwig Painting Blog. You
can see the previous posts Here .
With the camouflage coats and chipping fully applied and locked in, I can
now start on the enamel weathering effects. I'm primarily using the AK
Afrika Korps Weathering Set but will also be using some
artist's oil paints as well.
Step 5: Time for a Filter
Applying a filter helps to soften the transitions between the camouflage
colours and adds come more chromatic chromatic richness to the large areas. The
Filter for Afrika Korps is quite a vibrant yellow ochre, so I thinned
it down with odourless turpentine to a 50/50 mix, as I was after a more subtle
finish.
Continue reading...
Welcome to the first part of an in depth series for painting Afrika Korps
camouflage. The model used is a Ludwig from Dust Tactics, but this technique and
colours could be used for Flames of War, Bolt Action or even sci-fi armies in a
desert setting.
Choosing the Colour Scheme & Method
As with any painting project, before you begin you need to have a think about
what paint scheme you'll be using and what methods you're wanting to use. For my
Axis force I've chosen to theme the army on the Neu Afrika Korps
(NDAK), so I'll be basing my paint and camouflage schemes upon those used by the
German Afrika Korps in World War II.
I'm also wanting to incorporate a number of the painting techniques which
I've showcased before in our Gorilla
Tutorials and Flames
of War Fridays. Namely pre-shading, colour modulation, chipping
effects and a whole lot of weathering.
Continue reading...
After the tournament at Flameson I'd taken a little time out from painting my
Dust
Tactics miniatures while I worked on some other projects. But with the
upcoming Operation Babylon releases due to arrive in a month or two
I figured it was time to get stuck into my NDAK force in preparation for some
big games.
The first model I chose to work on is the Horten HO-347,
which was the first Dust aircraft released for the Axis. This older variant is
currently out of print and can be configured as either the tank-hunting
Fledermaus III or the Fledermaus IV bomber.
Step One: Priming and Pre-shading
Firstly I did a little bit of cleanup work on the main fuselage of the
model, using some liquid green stuff to fill in some of the assembly gaps and
sanding back to get smooth curves on the leading edges of the wings.
Continue reading...
One of the most frequently asked hobbies question any time of year is
what do I need to put together this model kit? And with Christmas on
the way there will be heaps of new hobbyists with model kits under
the tree.
So we've put together a quick guide to the basic tools and supplies a
beginning modeller will need in order to get started building scale models.
Basic Tools for Building Plastic Model Kits
- Clippers
- Modelling Knife
- Plastic Cement
Continue reading...
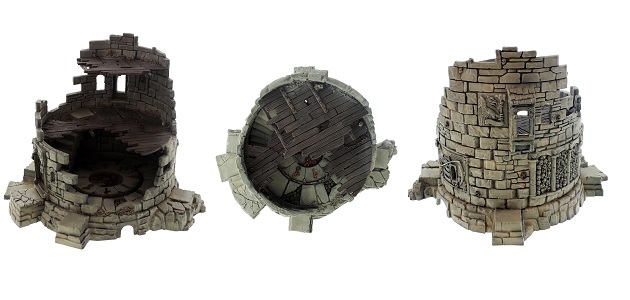
This week's Gorilla Tutorial
takes you through painting the Warhammer Dreadstone Blight
terrain piece. The techniques used can also be used on other similar stone
buildings, walls or even castles, are quick and easy to do and won't need heaps
of extra paints and supplies.
You can find all the paints and weathering products used in this project
here: Dreadstone
Blight Paint Collection
So lets get painting!
Continue reading...
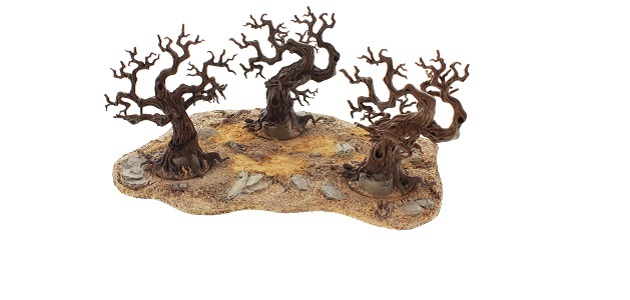
In this Gorilla Tutorial
I'll take you through a quick and easy way to paint up a Citadel
Wood using the Agrellan Earth technical paint to add some
extra texture. I'll also show you how to add a desert theme to the base.
You can find all the paints and weathering products used in this project
here: Citadel Wood
Tutorial
Continue reading...
OK Deadzone
fans its time to look how to paint the larger Plague Models,
including the massive Stage 1A.
In our last Deadzone
blog I took you through my new method for painting the Plague Stage 3s in a
“Hulk” style green scheme. For the larger Plague models the method is mostly
the same, however you'll need to spend a little more time on the bone areas as
they are more pronounced.
Continue reading...
As I mentioned in last weeks Painting Enforcers post we're gearing up to have
some Deadzone
games here at Mighty Ape HQ and I've chosen the Plague as my
force to take on the Computer Gorilla's Enforcers.
The Plague have some of my favourite models in Deadzone, the hulking Stage
1A and the slightly less mutated but lightning fast Stage 2s.
I'm also quite a fan of the ‘Popeye’ style of the Stage 3s whose
overdeveloped upper bodies make them look like they've been stocking up on
Mutant Mass from our Fitness & Nutrition category
The Plague models have 2 main areas to paint, the muscles and the bone
plates, and I wanted to go for a different colour scheme to the pink/red tones
used in the Deadzone artwork. Instantly I thought of the Hulk and decided upon
a mean, green skin tone and grabbed a few of the Stage 3 models to test it
using a new technique.
Continue reading...